Contents
For installers
Introduction
Subwoofer Installation
Subwoofer-Amplifier Installation
For users
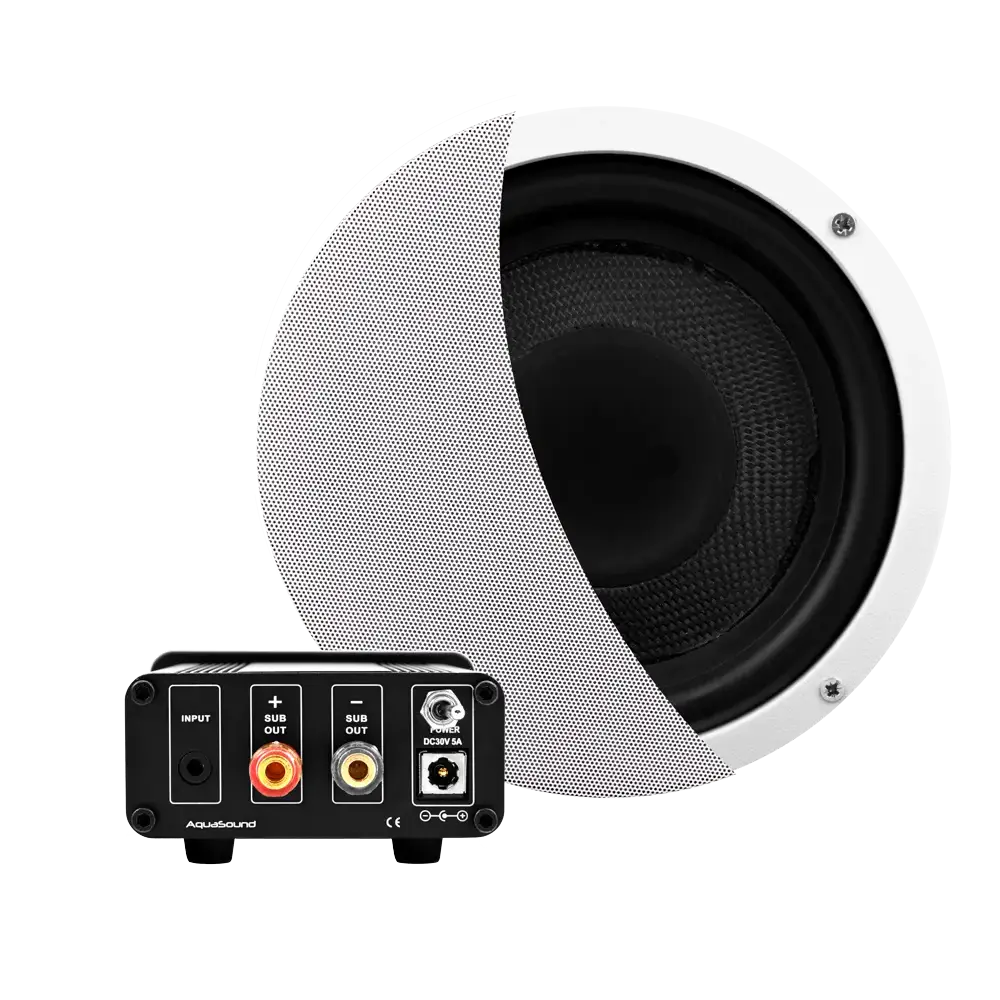
Overview of Components
The following components are included with the Subwoofer-Kit.
Subwoofer-Amplifier
- Subwoofer-Amplifier
- DC Adapter
- Audio-link cable (mini-jack)
Subwoofer
- Subwoofer
- Speaker grille
- Mounting frame
- Speaker hole template
- Speaker wire (pre-connected)
- 4x M4 screws, 120 mm long
- 1x Screw with plug, 12 mm round
Introduction
The AquaSound Subwoofer-Kit is an additional system that can be used in combination with an AquaSound Bluetooth or WiFi-Audio System. The Subwoofer-Kit provides strong support for the low bass tones of the sound.
The Subwoofer-Kit consists of two components: the Subwoofer itself and a Subwoofer-Amplifier. The Subwoofer can be mounted in any desired location in the ceiling, but the Subwoofer-Amplifier is placed next to the Bluetooth or WiFi-Audio Amplifier.
Below, we provide some tips regarding other AquaSound Audio Systems.
A. Completely new installation of the Subwoofer-Kit and Bluetooth or WiFi-Audio System
In general, we recommend placing the Bluetooth or WiFi-Audio Amplifier through the speaker hole of one of the full-range speakers, above the ceiling.
This makes it slightly more convenient to prepare all speaker holes first and then fully install the Subwoofer-Kit. Finally, the Bluetooth or WiFi-Audio System can be installed, and the volume control can be adjusted to taste.
B. Adding the Subwoofer-Kit to an existing AquaSound Bluetooth or WiFi-Audio System
It's also possible to add the Subwoofer-Kit to an existing system later. In this case, one of the full-range speakers will need to be temporarily removed to install the Subwoofer-Amplifier next to the existing Bluetooth or WiFi-Audio Amplifier. Finally, the volume control can be adjusted to taste.
If the Subwoofer-Kit is added to a slightly older Bluetooth or WiFi-Audio System, the AUX-OUT may be missing on the existing amplifier. In that case, please contact us.
Subwoofer Installation
When installing the Subwoofer, a few important points must be considered.
- The installation depth is at least 120 mm, measured from the visible side of your suspended ceiling.
- The installation depth is a maximum of 160 mm. Deeper is possible, but this must be resolved structurally.
- There must be a power socket behind the ceiling.
- The hole size in the suspended ceiling for the Subwoofer is 214 mm. The Subwoofer’s diameter is 212 mm. The Subwoofer does NOT make contact with the suspended ceiling.
- The included Subwoofer-Amplifier is placed next to the Bluetooth or WiFi-Audio Amplifier received with the other speaker set.
When these requirements are met, the Subwoofer can be installed in the ceiling without issues.
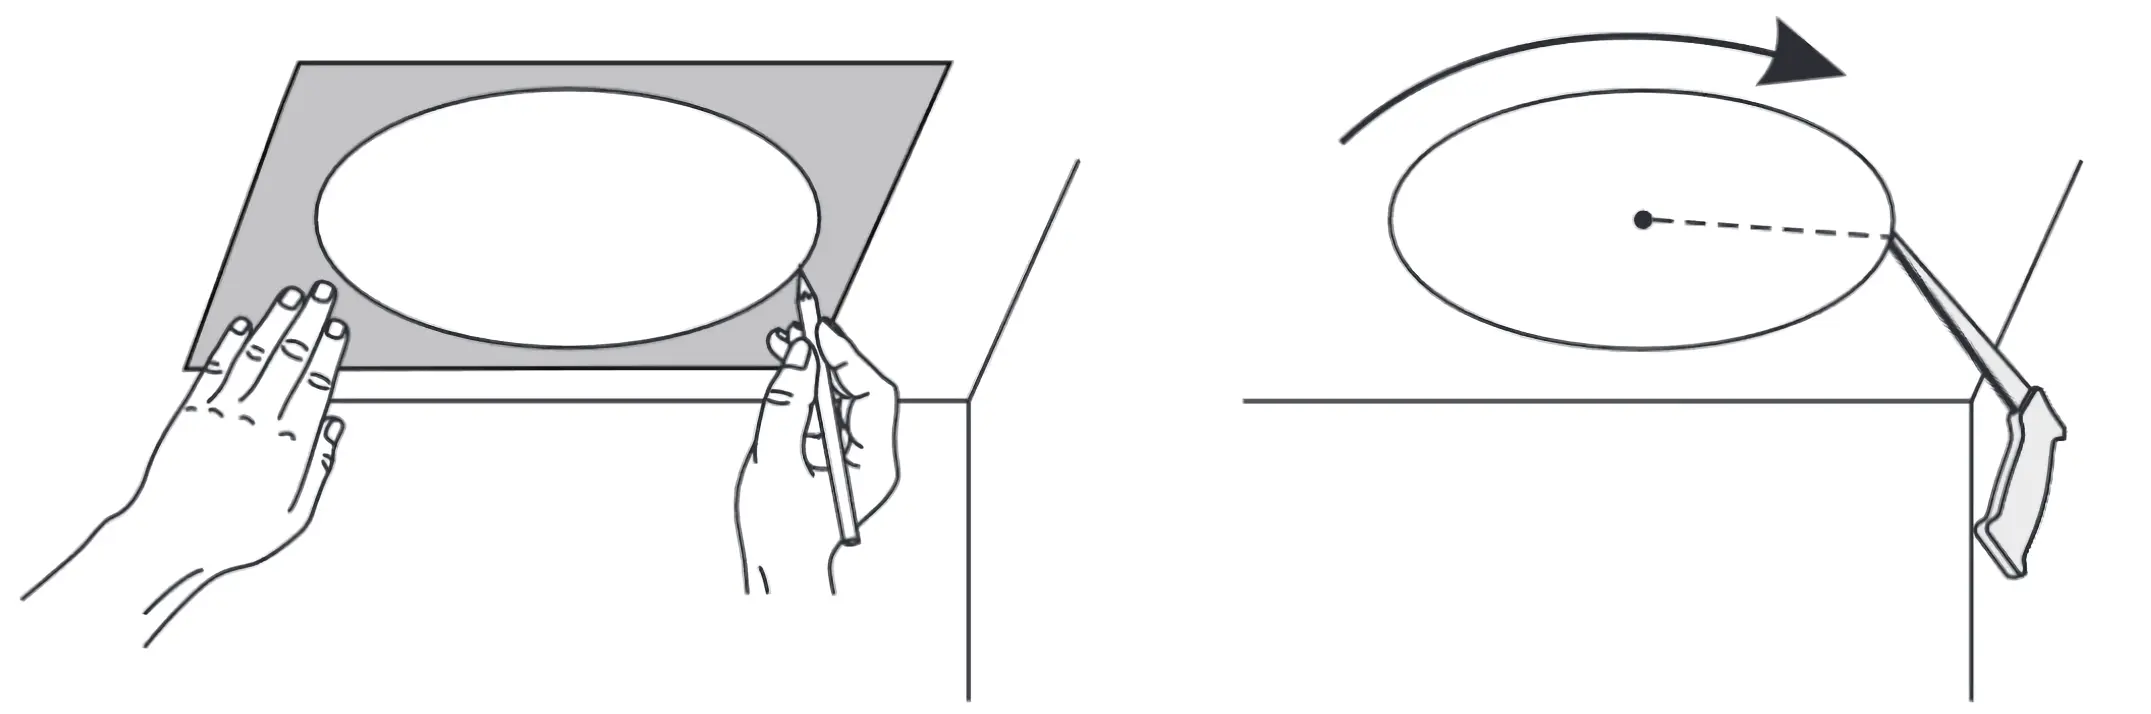
- Use the template to mark exactly 214 mm on the suspended ceiling and cut it out as carefully as possible. The Subwoofer fits precisely in this hole and does NOT make contact with the suspended ceiling.
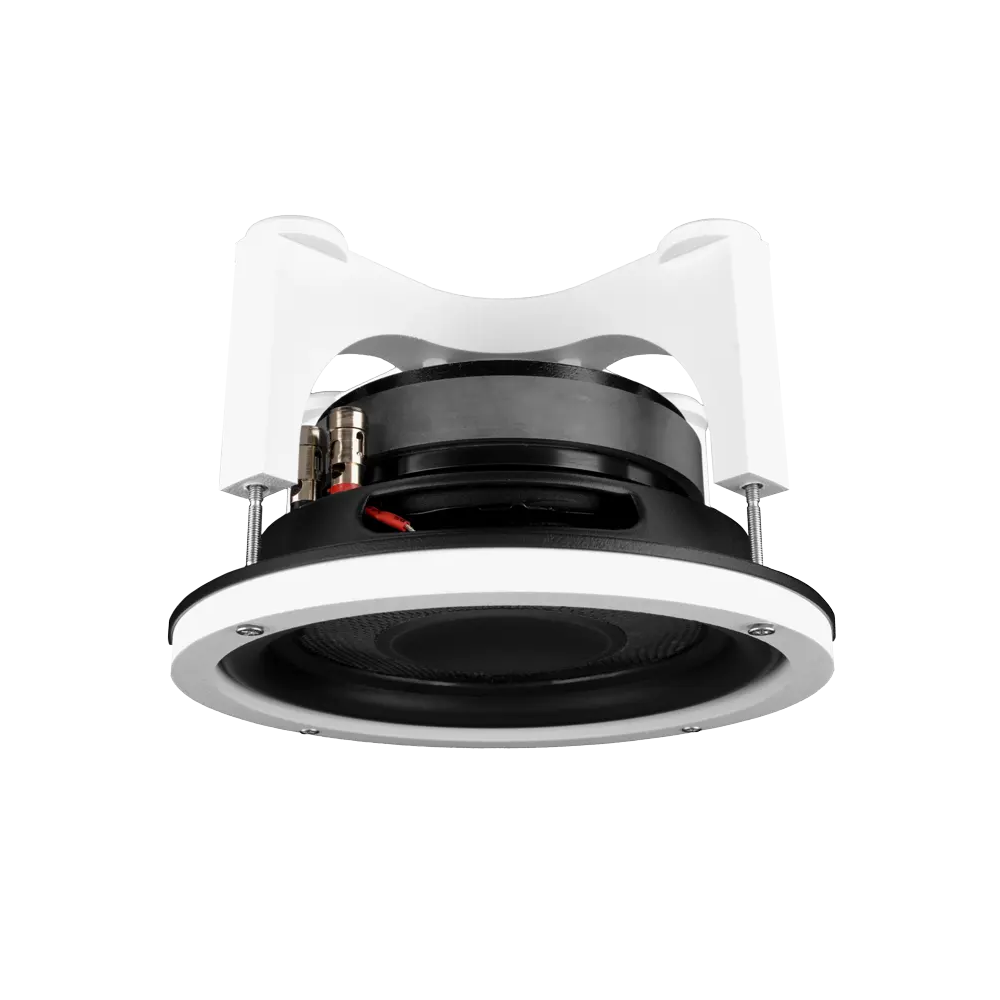
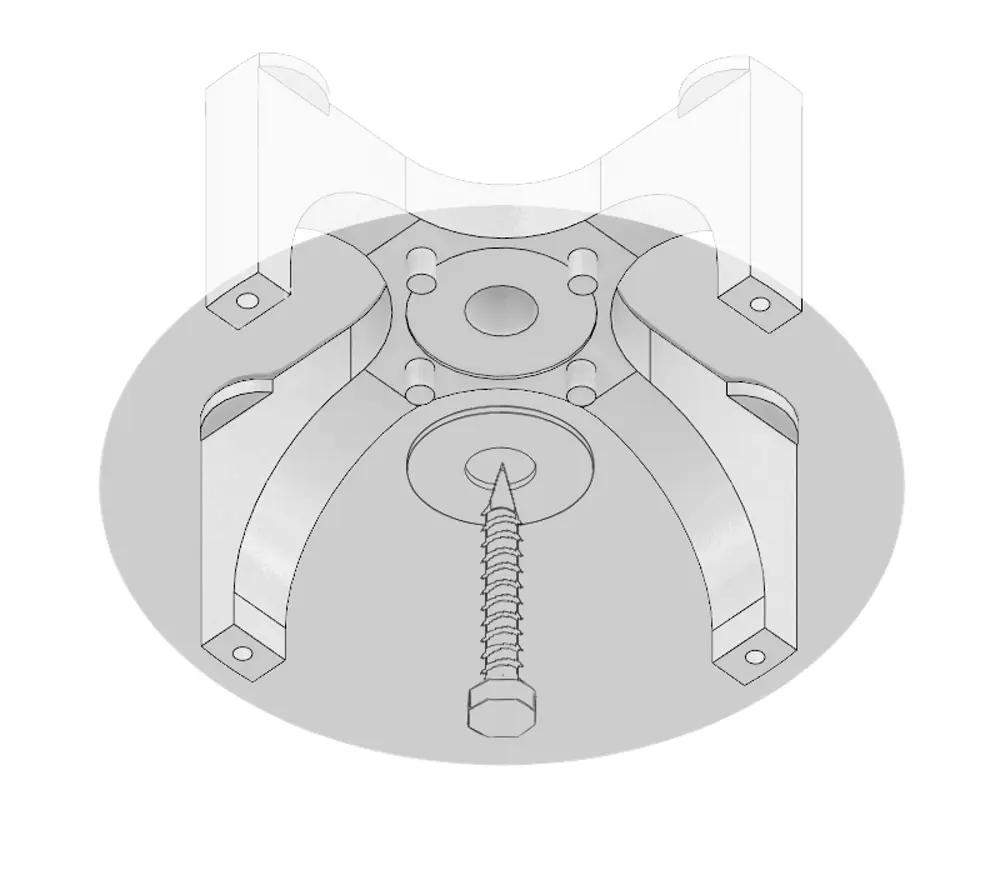
- Place the mounting frame exactly in the centre of the hole against the original ceiling. Use the included screw with plug (12 mm round) to secure the frame.
- Ensure that the pre-connected speaker wire reaches the location where the Subwoofer-Amplifier will be placed, next to the Bluetooth or WiFi-Audio Amplifier.
- The Subwoofer can now be screwed into the frame using the 120 mm screws. Tighten the screws just enough so that the Subwoofer protrudes about 3 mm below the ceiling.
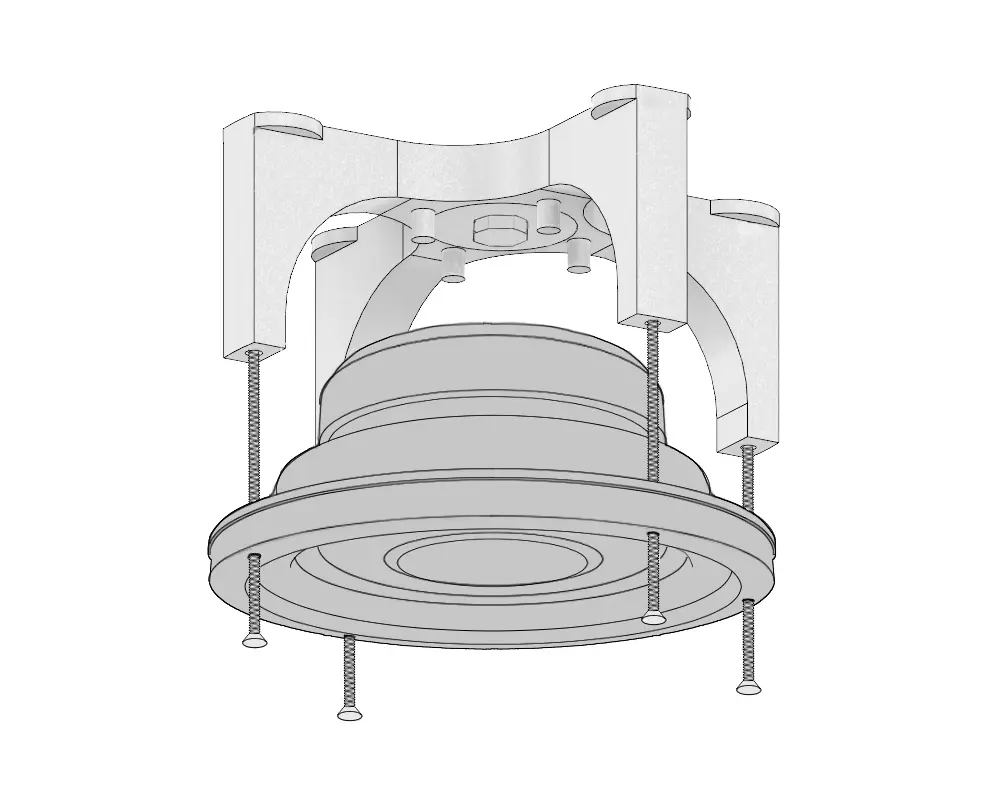
- Place the speaker grille on the Subwoofer. It will be held in place magnetically.
Subwoofer-Amplifier Installation
The Subwoofer-Amplifier is typically placed above the ceiling behind an easily removable speaker, close to the Bluetooth or WiFi-Audio Amplifier received with the other set. This requires attention to a few important points.
- There must be a power socket behind the ceiling to power the Subwoofer-Amplifier. Since you now have two amplifiers in the same location, a total of two power sockets are required.
Below, we outline the steps for connecting the cables to the Subwoofer-Amplifier.
- Cut the speaker cable to size and strip the ends.
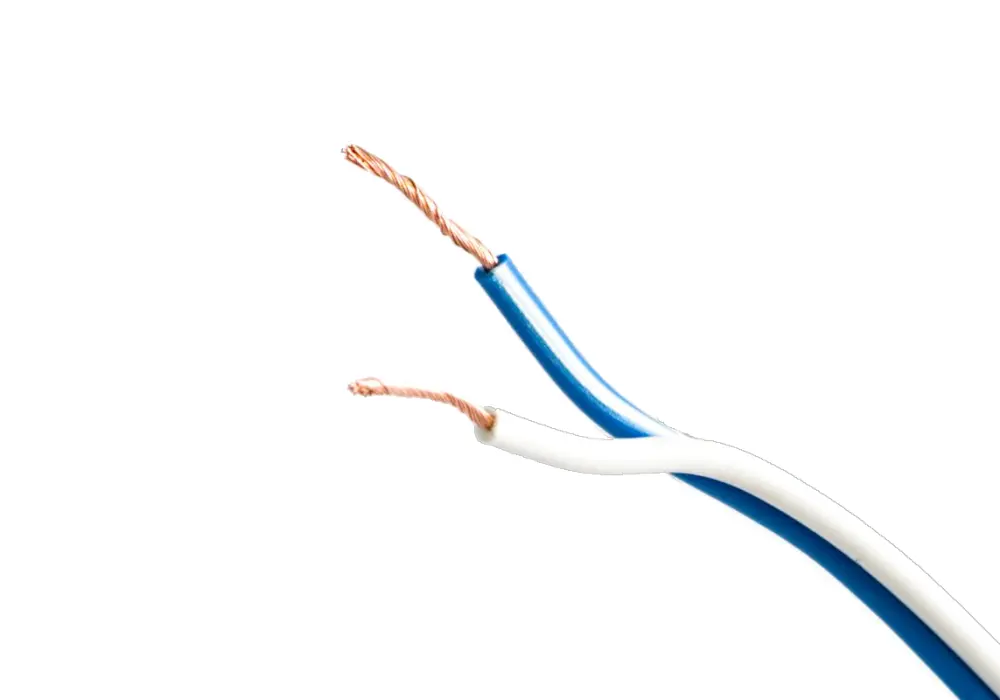
- Connect it to the amplifier: Blue to plus (+), white to minus (-). For custom cables: red to plus (+), black to minus (-).

- Connect the audio-link cable to both amplifiers.
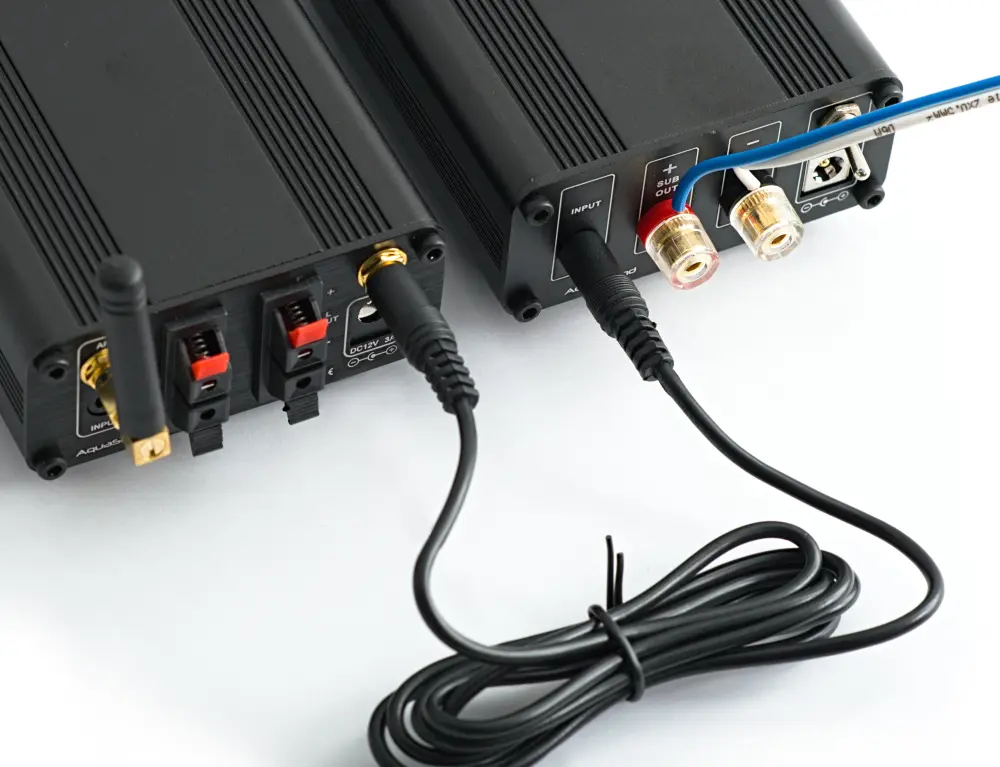
- Connect the adapter and plug it into the power socket. Turn on the amplifier using the power button on the back.
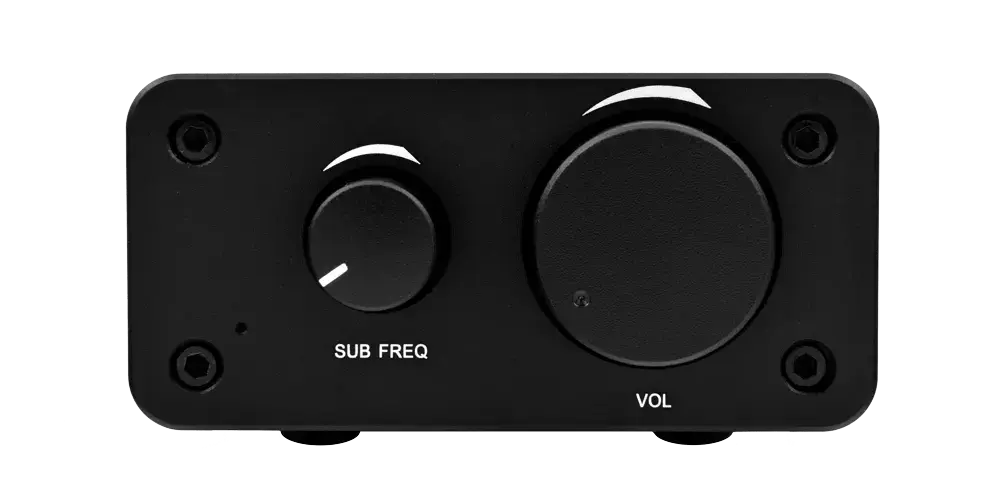
Set the volume knob on the front of the Subwoofer-Amplifier to a level where you still have a pleasant listening experience at maximum volume. This is not 100 percent, but rather 60 or 70%. The easiest way is to pair your mobile phone with the Bluetooth or WiFi-Audio Amplifier and play sound at the maximum phone volume. Then, adjust the volume knob to a level where the sound is pleasant.
The Subwoofer-Amplifier also has a frequency knob. Use this to filter the high tones from the Subwoofer to your preference.
After this, both amplifiers can be placed above the ceiling through the speaker hole.
Conclusion
Your Audio System is now ready for hours of listening pleasure! If you encounter any unexpected issues that this manual does not resolve, please do not hesitate to contact us.
If you are satisfied with our products, we warmly invite you to leave a review on Google. Click here to go to the review page.